How To: Add a MailChimp Sign Up Form to Postach.io
The best way to keep readers regularly engaged with your blog is to set up a mailing list. This allows you to send subscribers a daily or weekly email with a summary of everything you've been writing about on your blog.
In this tutorial you're going to learn how to add a mailing list sign up form to your Postach.io blog. We'll be using MailChimp for this tutorial, but the process is very similar for other services.

Setting up MailChimp
First of all you'll need a MailChimp account. Head over to mailchimp.com and create one (if you haven't got one already).
Now you need to set up a new mailing list that will store all of your subscribers. If you already have a mailing list set up in MailChimp, feel free to skip to the next section.
To create a new mailing list, first log in to your account.
Now, select Lists from the navigation menu.
Click the Create List button in the top right corner and fill in your details to set up your new mailing list.
Once you're done, click Save and you're ready to go.
Building the Sign up Form
Now that you've got your mailing list set up, it's time to work on the HTML form that you'll be inserting into your Postach.io theme. Luckily MailChimp provides a number of handy code snippets for creating sign up forms.
Creating Your MailChimp Sign up Form
Log in to MailChimp and navigate to your list (Lists > Your List). Once you're on the overview page, click the Signup forms link in the navigation.
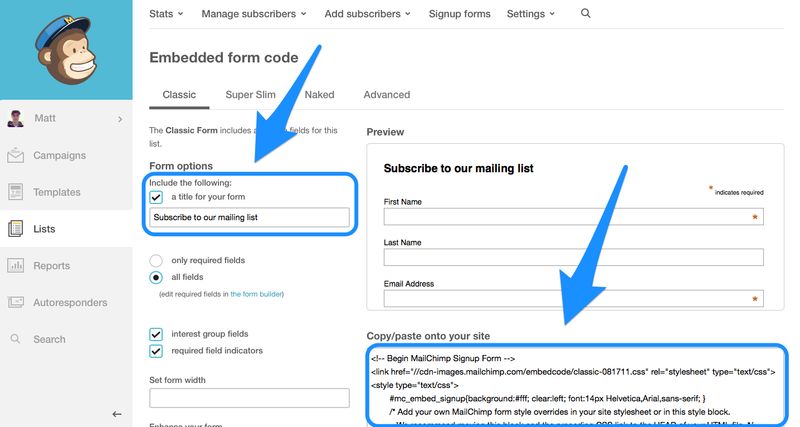
You're now presented with three different options: General forms, Embedded forms, and Form integrations. You're going to be embedding the sign up form within your Postach.io theme so click on Embedded forms.

This screen has lots of options to help you customize your form. You'll likely want to change the heading that's displayed above the form so update the first text-field on the left.
Once you're done making your changes, the code for your form is displayed in a text box in the bottom right corner. This is what you're going to add to your Postach.io theme. It should look something like the following:
Adding the Sign up Form to Your Postach.io Theme
Now you've got the form code, you need to log in to Postach.io and add the form to your theme.
Start by logging in to your Postach.io account at http://postach.io.
On the dashboard page, click the settings icon for the blog you'd like to add the form to.
Now you need to select the Source Editor tab. If you haven't dealt with HTML code before, this might look a little alien, but don't worry, you're only going to be copy and pasting some code.
You now need to decide where you would like the form to be displayed. I like to have the sign up form displayed after the blog post content, and only on the main post pages, not on the home or tag pages. To do this, you need to paste the form code you got from MailChimp underneath the div element with the class post-footer. If you're using the default 'Expanse' theme, that's about line 194 at the time of writing this post.
The first part of the code you got from MailChimp actually belongs somewhere else in the theme template. Copy the link html element and everything within the style html element that follows it, and paste it just before the closing head html tag at the top of the template. Be sure to delete those lines from their original location too.
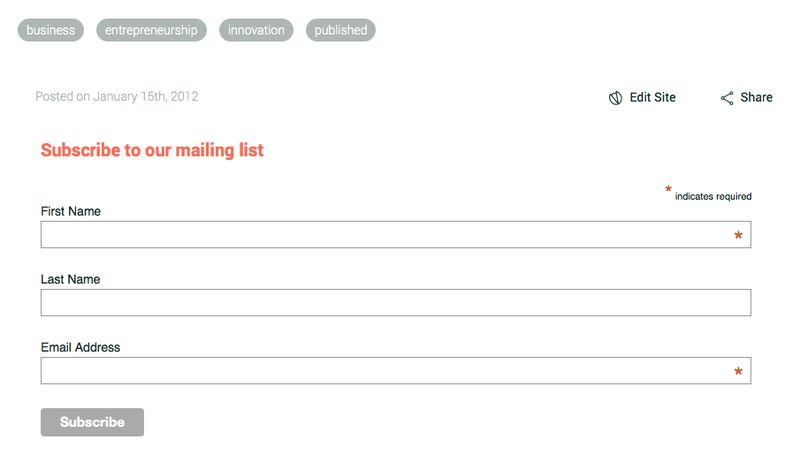
Now if you hit Save and load up a post on your blog, you should see that the mailing list form is displayed underneath the post (as below). Try doing a test sign up to make sure that everything is working.

Styling the Sign up Form
You can style your new sign up form using CSS. In this section we're going to focus on some pretty simple styling changes, but if you're familiar with CSS feel free to get creative!
Remember that style element that you moved up into the head in the previous section? That's where you're going to be putting the code to style your form.
Let's start by adding a background color to make the form stand out.
Alter the background rule within the #mc_embed_signup selector and change the color to #F7F7F7.
background: #F7F7F7;
Now you can add a border. Add the following code within the #mc_embed_signup block.
border: 1px solid #EEE;
border-radius: 3px;
This code will put a thin border around the form and round-off the corners.
Next, you need to add a bit of a margin so that there's some space between the post metadata and the form.
margin-top: 3em;
Finally, you're going to remove the margin applied to the form heading. Add this code below the #mc_embed_signup block within the style element.
#mc_embed_signup h2 {
margin: 0;
}
Your style element should now look like the following:
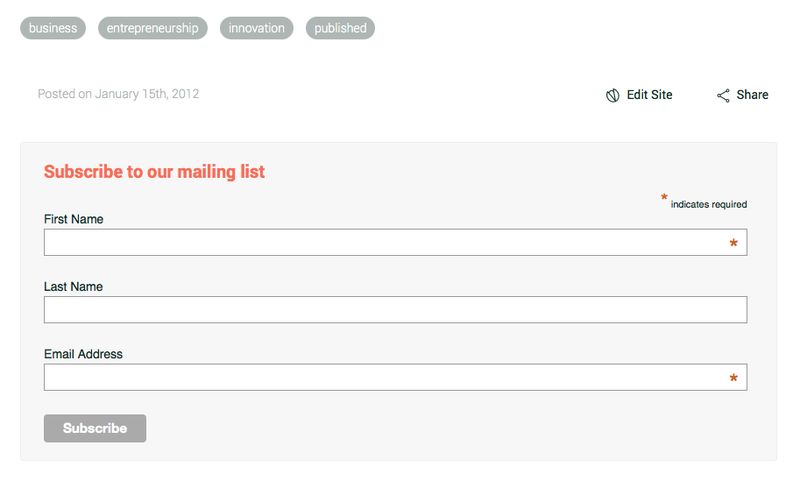
Hit the Save button and reload your blog to see the changes take effect. Play around with the CSS code until you achieve the look you're going for.

Summary
You're done! In this tutorial you've learned how to add a MailChimp sign up form to your Postach.io blog.
Sending out a regular email with a summary of your latest blog posts is a great way to keep your audience engaged. Don't expect readers to come to your blog. It's hard to build new habits, so reaching your audience via the channels they're already used to checking is a great way to keep people engaged.
Useful Links